Showing posts with label Tutorials. Show all posts

Wednesday, 17 February 2016

Coin Illustration

Trying to find fast method to draw clean digital illustrations
I follow this tutorial:

Thursday, 28 August 2014

Integrate a playable character in Unity

Finally learning about Unity.

Here is how to set a character in Unity.

1.Export an .fbx of the character from 3ds max.

2. Import in Unity by dragging the .fbx file into the project pane.

3. select the .fbx file in the project pane and go to the rig tab. select Humanoid for the animation type. click configure. the bones need to be all green. Otherwhise, you need to assign them. press done button.

4. Found a prefab file to use with all the necessary script (you can use the third person controller prefab)

in my case, I already had a prefab, but I needed to replace the old character mesh by the new one.


In the hierarchy, the player node is my prefab and also the playable character.


In the project pane, I have my new mesh called glimpse_SK. I need to drag it in the scene and positione it at the same place than the old character. A new node called glimpse_SK will appear in the hierarchy.


In the hierarchy, Girl is the old mesh. delete it and drag the new glimpse_SK node to it place.


then, I change the animator option of the prefab player and chose glimpse_SK.


By selecting your character node, you can change the animation controller.


Wednesday, 20 August 2014

Extrude from a spline

Create a spline with the ep cuve button

right mouse click to edit the vertex


create a shape. A cylinder in this case.
select the polygon to extend and the spline and press the extrude button

after the extrusion, it will look like this:

Go to the right panel of the shape or spline. Add divisions.

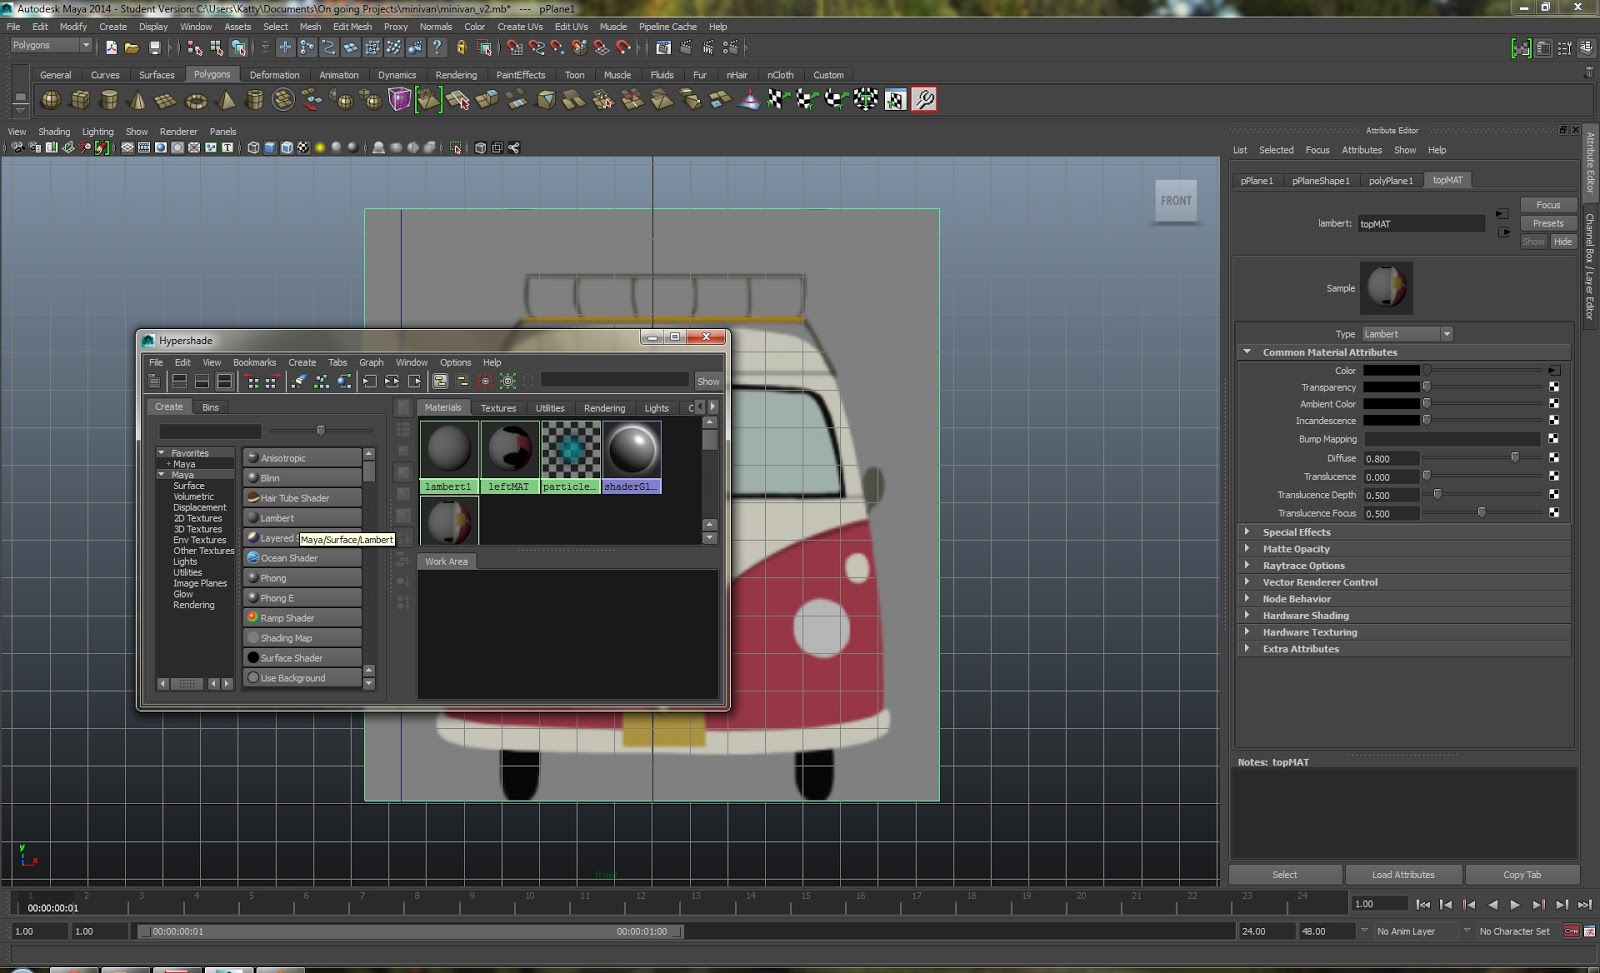
Material in Maya

To apply a material
In the hypershade window, middle mouse click on material and drag to object
or
left mouse click on object, asign new or existing material

Sunday, 17 August 2014

Render wireframe in Maya

Here is a nice tutorial about how to render the wireframe in Maya:

http://nealbuerger.com/2013/06/maya-2014-wireframe-rendering-using-mental-ray/

The shading groups are accessible in the hypershade window.

Monday, 11 August 2014

Unwrapping and in Maya

Unwrapping
Window -UV Texture Editor


automatic uv projection


edit unwrap
right click on object and select UV

save uv


Here is an amazing software I found to unwrap insteand of unwraping in Maya. It also work for 3ds max, but you need to install a 3ds max plugin for the obj's import and export.
http://www.pullin-shapes.co.uk/page8.htm


Saturday, 2 August 2014

How to deform objects in Maya

You can use the lattice tool to deform object in Maya.

1.Select the object to deform

2. Activate the animation menus

3.Open the Create Deformers menu
   click on Lattice

4. In the right panel, have the attribute editor opened.
    You can adjust the latice divisions

5. Hold right button mouse add select Latitce point

6. Now you can edit the points and move them as needed to remake the shape.

7. When you are satisfied with the result, go to edit- Delete All by Type- History
     The latice shape will be cleared


Tuesday, 29 July 2014

Maya tips and shortcuts

Reposition pivot point


Press Insert on the keyboard.

hold V and move the pivot to activate snapping

Press Insert to exit edit pivot mode.

snap the object from it pivot point to a grid line
X + move with move tool

Smooth preview
number 3 on keyboard

Normal preview
number 1 on keyboard

object view
select an object and press F

extrude in one axis
click on extrude
press W to make the axis appear

Access a window stuck in another screen
With the window we want activated, press alt+ spacebar
press the down arrow button two times
press enter
move with the arrows in the right direction until you can access the window

access edit menus
spacebar
shift+right click
W+left click

center pivot
spacebar-modify-center pivot

combine two separate objects
select the multiple objects to combine with shift
mesh menu- combine

Monday, 28 July 2014

How to setup your image references


I am sharing my Maya methodology to setup planes.

First, I import a temporary image by going into View- image plane- import image...

I import the front view.


In front view, I create a plane and make it the same dimension as the imported image
Then, you can delete the imported image and conserve the plane.


Redo the steps for the profile plane.

Now, we will apply materials so that we can see own blueprints.
Window- rendering editors- hypershade

Add a new lambert material

Right panel, edit the lambert.
Click on the checker logo next to color.
In the opened create render node, select file. 

In the right panel again, click on the yellow folder logo.
In the open window, chose the file you need.
Repeat the material processus for the other plane.

If you can't see the pictures, make sure the two buttons in the picture below are activated.


Final setup ready for modelling:)

Setup photoshop grid for pixel art tile sheet

First, open a new file. Let say we start with a 128 x 128 pixels document.

Here, we will go for 9 tiles. So, you need to expend your image by 300%. Image- Image size

Now is the time to setup the grid. First, we want to see the separation between the tiles.
edit - preferences - guides, grids and slices
Gridline evenly: 128 in pixel (the image will be guided at each 128 pixels)

For easier pixel drawing, we will add more guides.
Subdivision: 2
You can also add more subdivision if you find it easier.

The result!

Make sure you draw with the pencil tool and that your eraser is in pencil mode.

Happy pixeling!

Thursday, 24 July 2014

Animation - Morphing integration from 3Ds Max to UDK

It is actually in french because I did it for my school which is in french. If anyone need a translation, just ask it and I will make one.

Voici un tutoriel que j'ai fait qui explique pas a pas comment faire un morph dans 3ds Max, l'importer dans UDK et controller l'animation par clés dans UDK.

Étapes:

3ds Max:

Avoir un mesh de base. Dans ce cas-ci, le mesh de base a été dupliquer 2 fois, pour avoir 2 morphs différents. Un ou le personnage sourit, et l'autre ou il ouvre la bouche. Le soft selection en vertex mode a été utilisé pour modifier les morphs.

Selectionner le mesh de base. Appliquer un "Morpher" modifier. Selectionner un box "empty", cliquer sur "Pick Object from Scene" et selectioner le premier mesh de morph.

Le mesh doit être relié à un bone pour être importer dans UDK. Créer un bone.

Ajouter un "Skin" modifier au mesh de base. Cliquer sur le bouton "add" pour ajouter le bone créer.

Exporter le mesh de base avec le bone et le bone's nub en .FBX. Cocher Animation et les 3 Déformations.

UDK:

Ouvrir le content browser. Importer le mesh. Cocher Import Morph Targets.

Un "Morph Target Set" sera automatiquement créer.

Double-click sur le mesh pour ouvrir l'AnimSet. Les Morph Targets devraient être là. Ici, ils le sont sous le nom de morph1 et morph2.

Creer un AnimTree.

Mettre le "Morph Target Set" et le Skeletal Mesh" dans l'AnimTree.

Click droit dans l'anim tree. Ajouter un "MorphNodeWeight"

Click droit dans l'anim tree. Ajouter un "MorphNodePose"

Renommer les "MorphNodePose" en utilisant le nom des morphs dans l'AnimSet.

Renommer les "MorphNodeWeight" par un nom désiré.

Avec le mesh selectioner, click droit dans la scene, ajouter un "SkeletalMeshMat"

Selectioner le mesh de la scene. Presser sur F4. Ajouter le mesh.

Ajouter le Morph Target Set.

Créer une sequence Matinée dans le Kismet.

Ouvrir le Matinée. Click droit pour ajouter un "Skeletal Mesh Group". Click droit de nouveau pour ajouter un "Morph Weight".

Copier le nom du "MorphNodeWeight" dans l'AnimTree et le coller comme nom du "Morph Weight" dans matinée

Cocher le carré noir du "Morph Weight". Ajouter des clés. On peut ensuite animer les point jaune entre 0.00 et 1.00.

Done!
Welcome to my personal blog. You can see my work by surfing in the portfolio section.