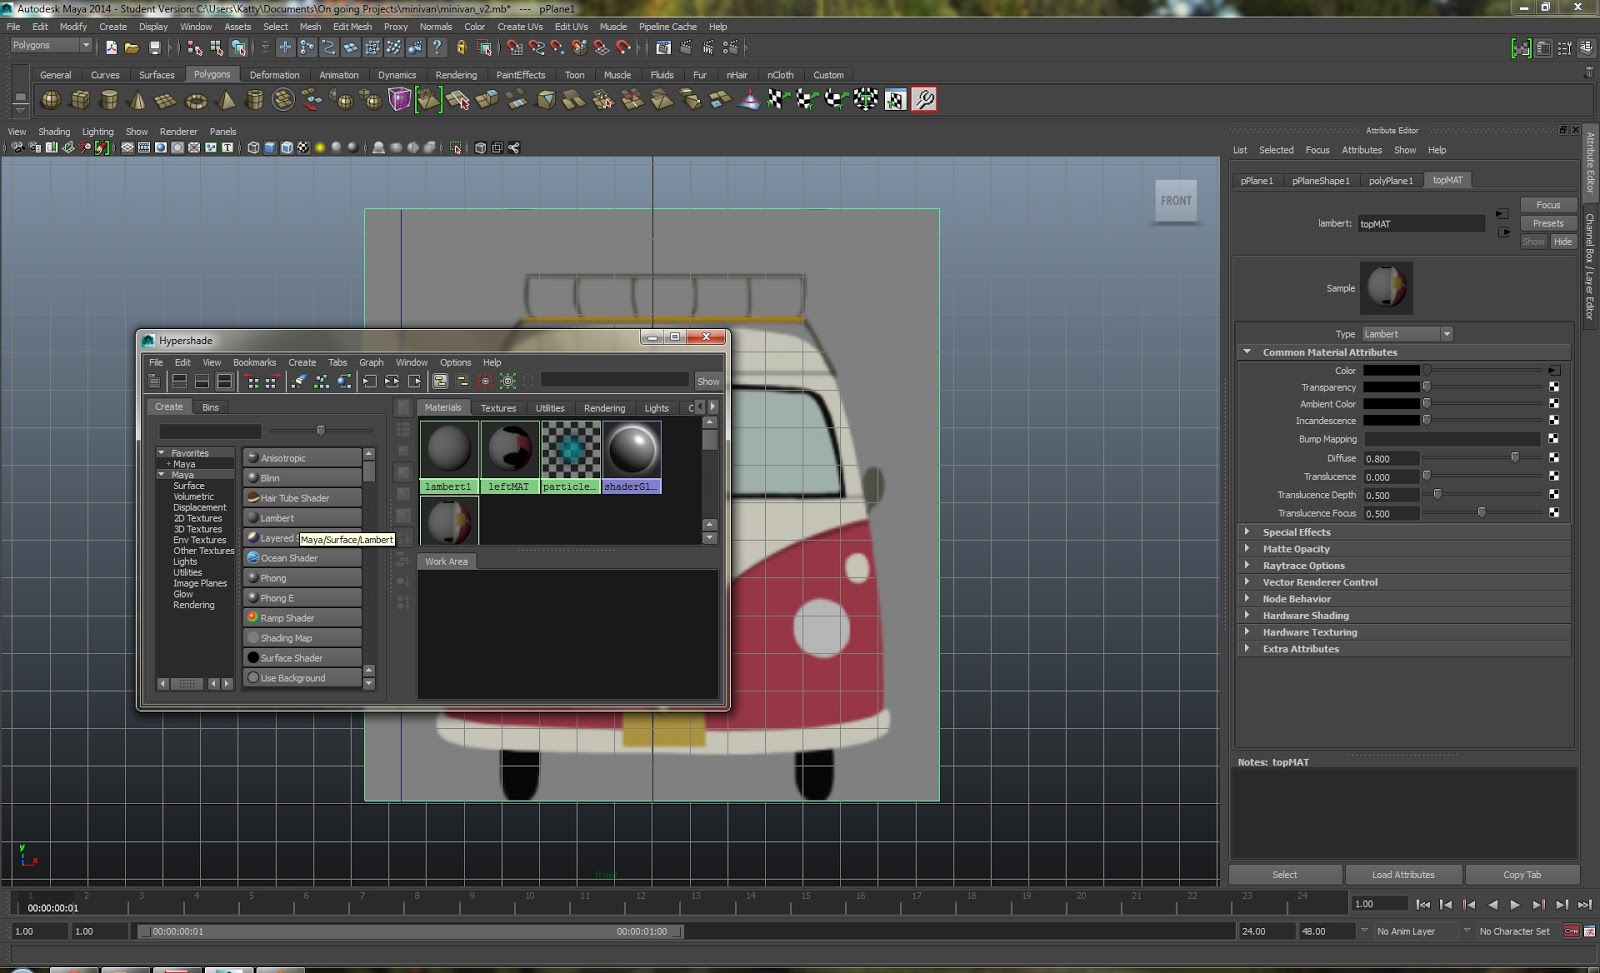
I am sharing my Maya methodology to setup planes.
First, I import a temporary image by going into View- image plane- import image...
I import the front view.
In front view, I create a plane and make it the same dimension as the imported image
Then, you can delete the imported image and conserve the plane.
Redo the steps for the profile plane.
Now, we will apply materials so that we can see own blueprints.
Window- rendering editors- hypershade
Add a new lambert material

Right panel, edit the lambert.
Click on the checker logo next to color.
In the opened create render node, select file.
In the right panel again, click on the yellow folder logo.
In the open window, chose the file you need.
Repeat the material processus for the other plane.
If you can't see the pictures, make sure the two buttons in the picture below are activated.
Final setup ready for modelling:)


No comments:
Post a Comment